
Well, I definitely want to do this again. I mean it’s a lot of work, but when you see the results…it’s hard to come by tall side tables like this on their own. I’ve always wanted to turn the vintage ends of a desk or vanity into bedside tables. When I spotted this beauty at the thrift store for just $45, and despite the missing pull, I knew it was a chance to give this a try. It passed the smell test, MOST of the hardware was intact, and the chunky legs got me!
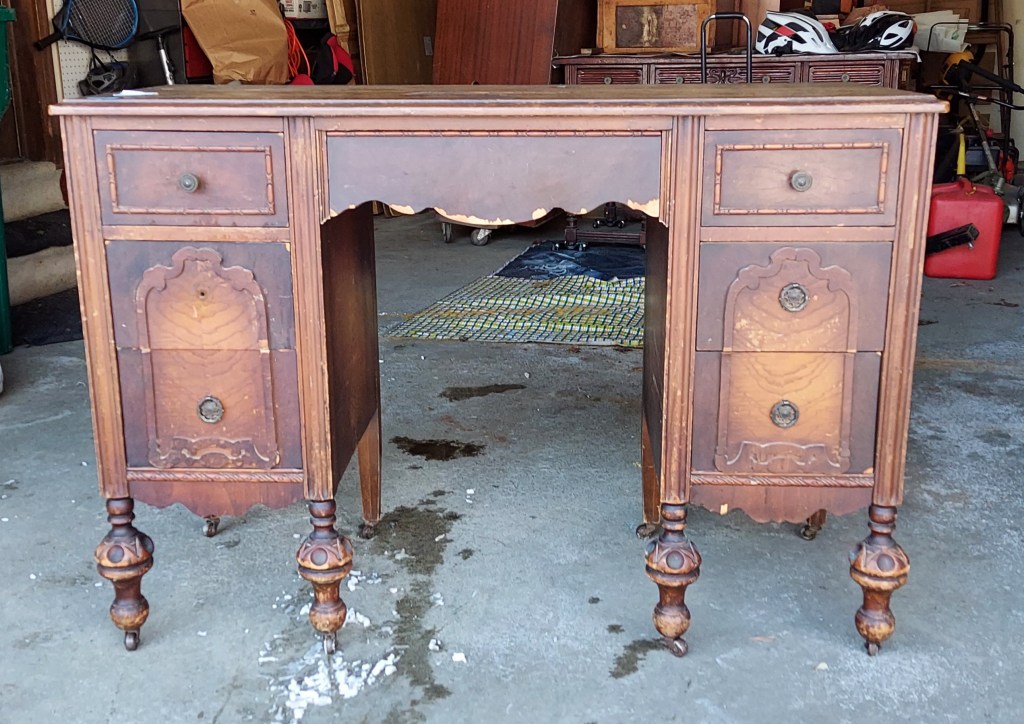
Matching vintage nightstands seem to be impossible to find around me. And nothing like the style of this vintage desk. You kind of have to work with what you can get.
When all you can find are lemons…get creative.
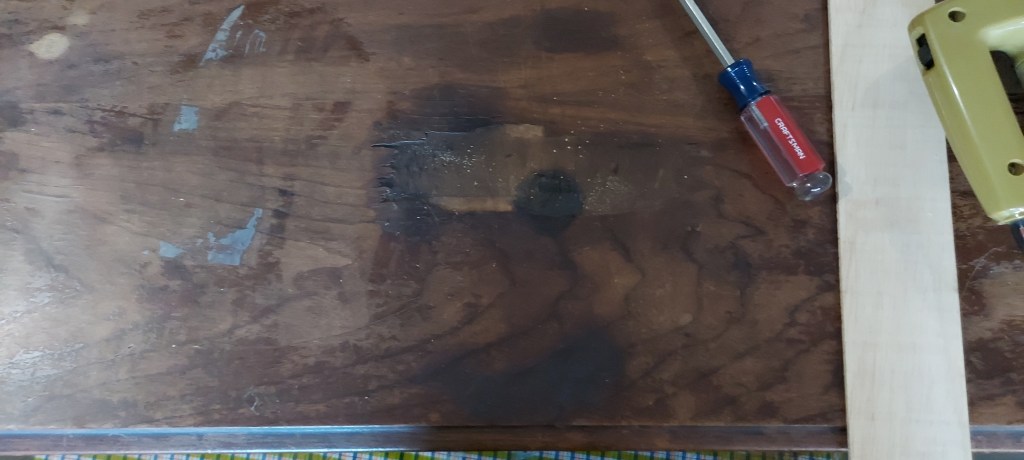
The other reason this seemed to be a good contender is that the middle of the top had some major veneer damage. It almost looked like there was a burn mark. But I didn’t need the middle, and I wouldn’t have to feel bad about cutting it out.
Demo Day
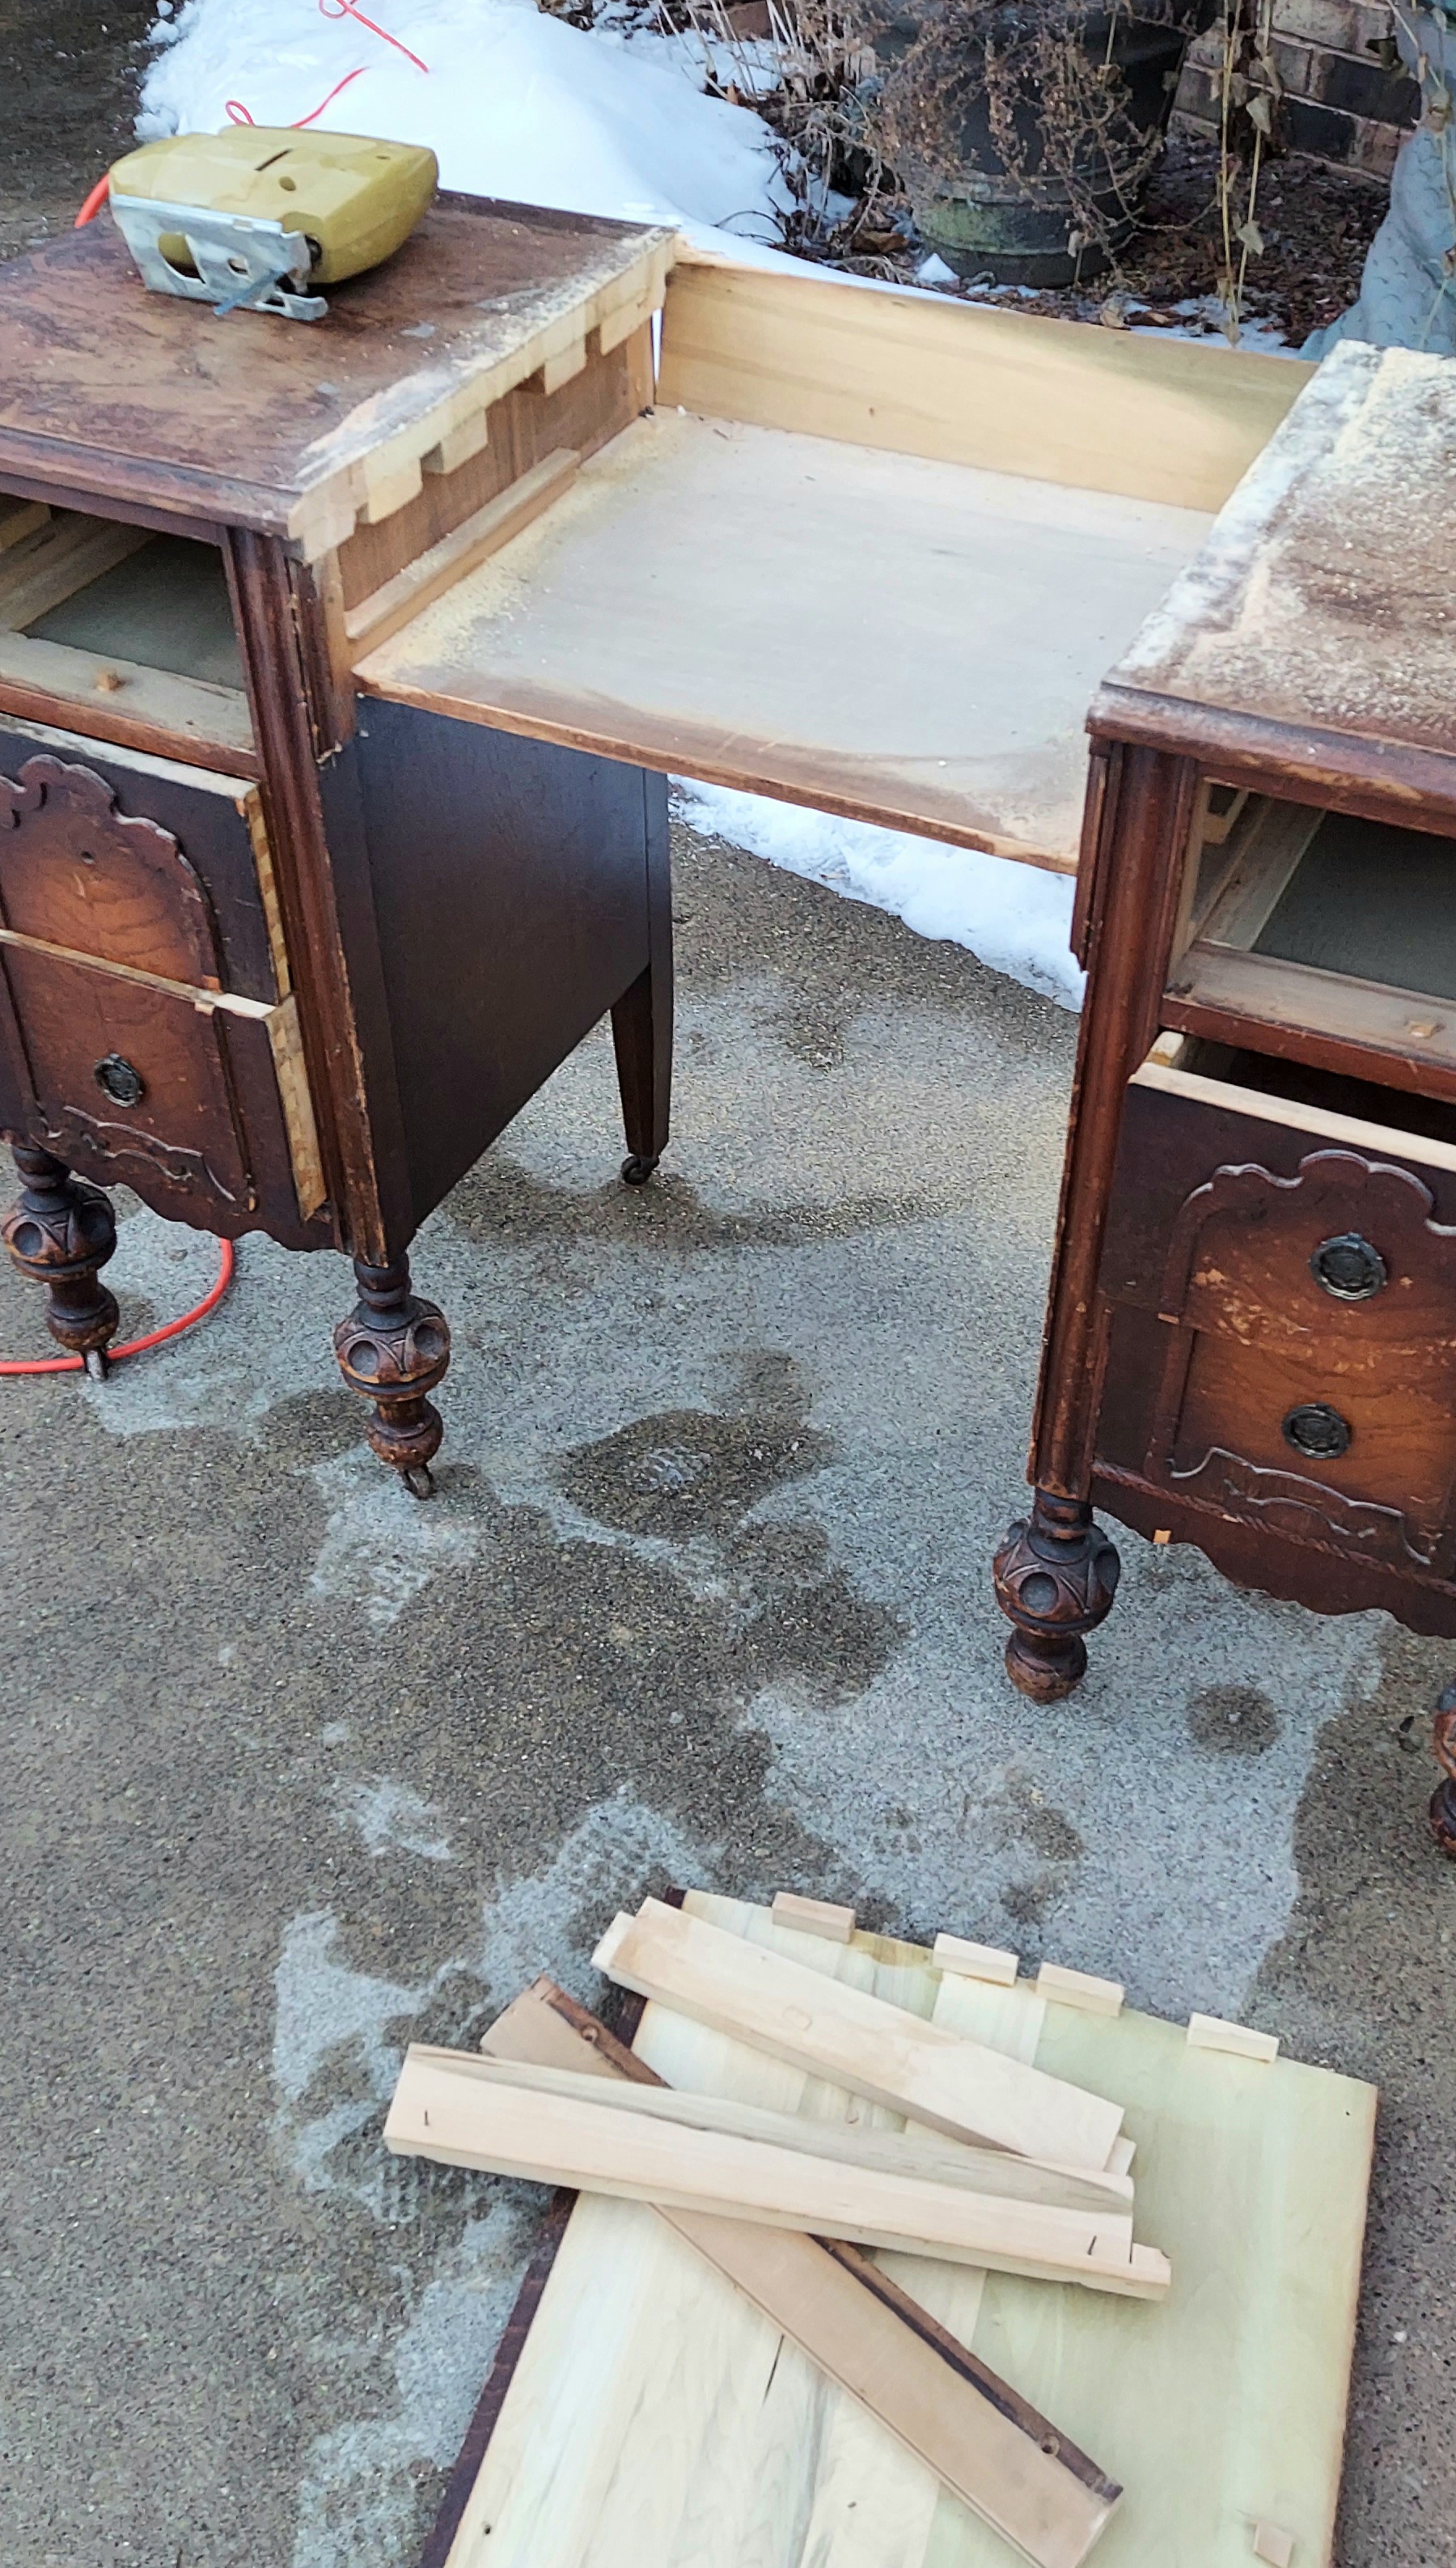
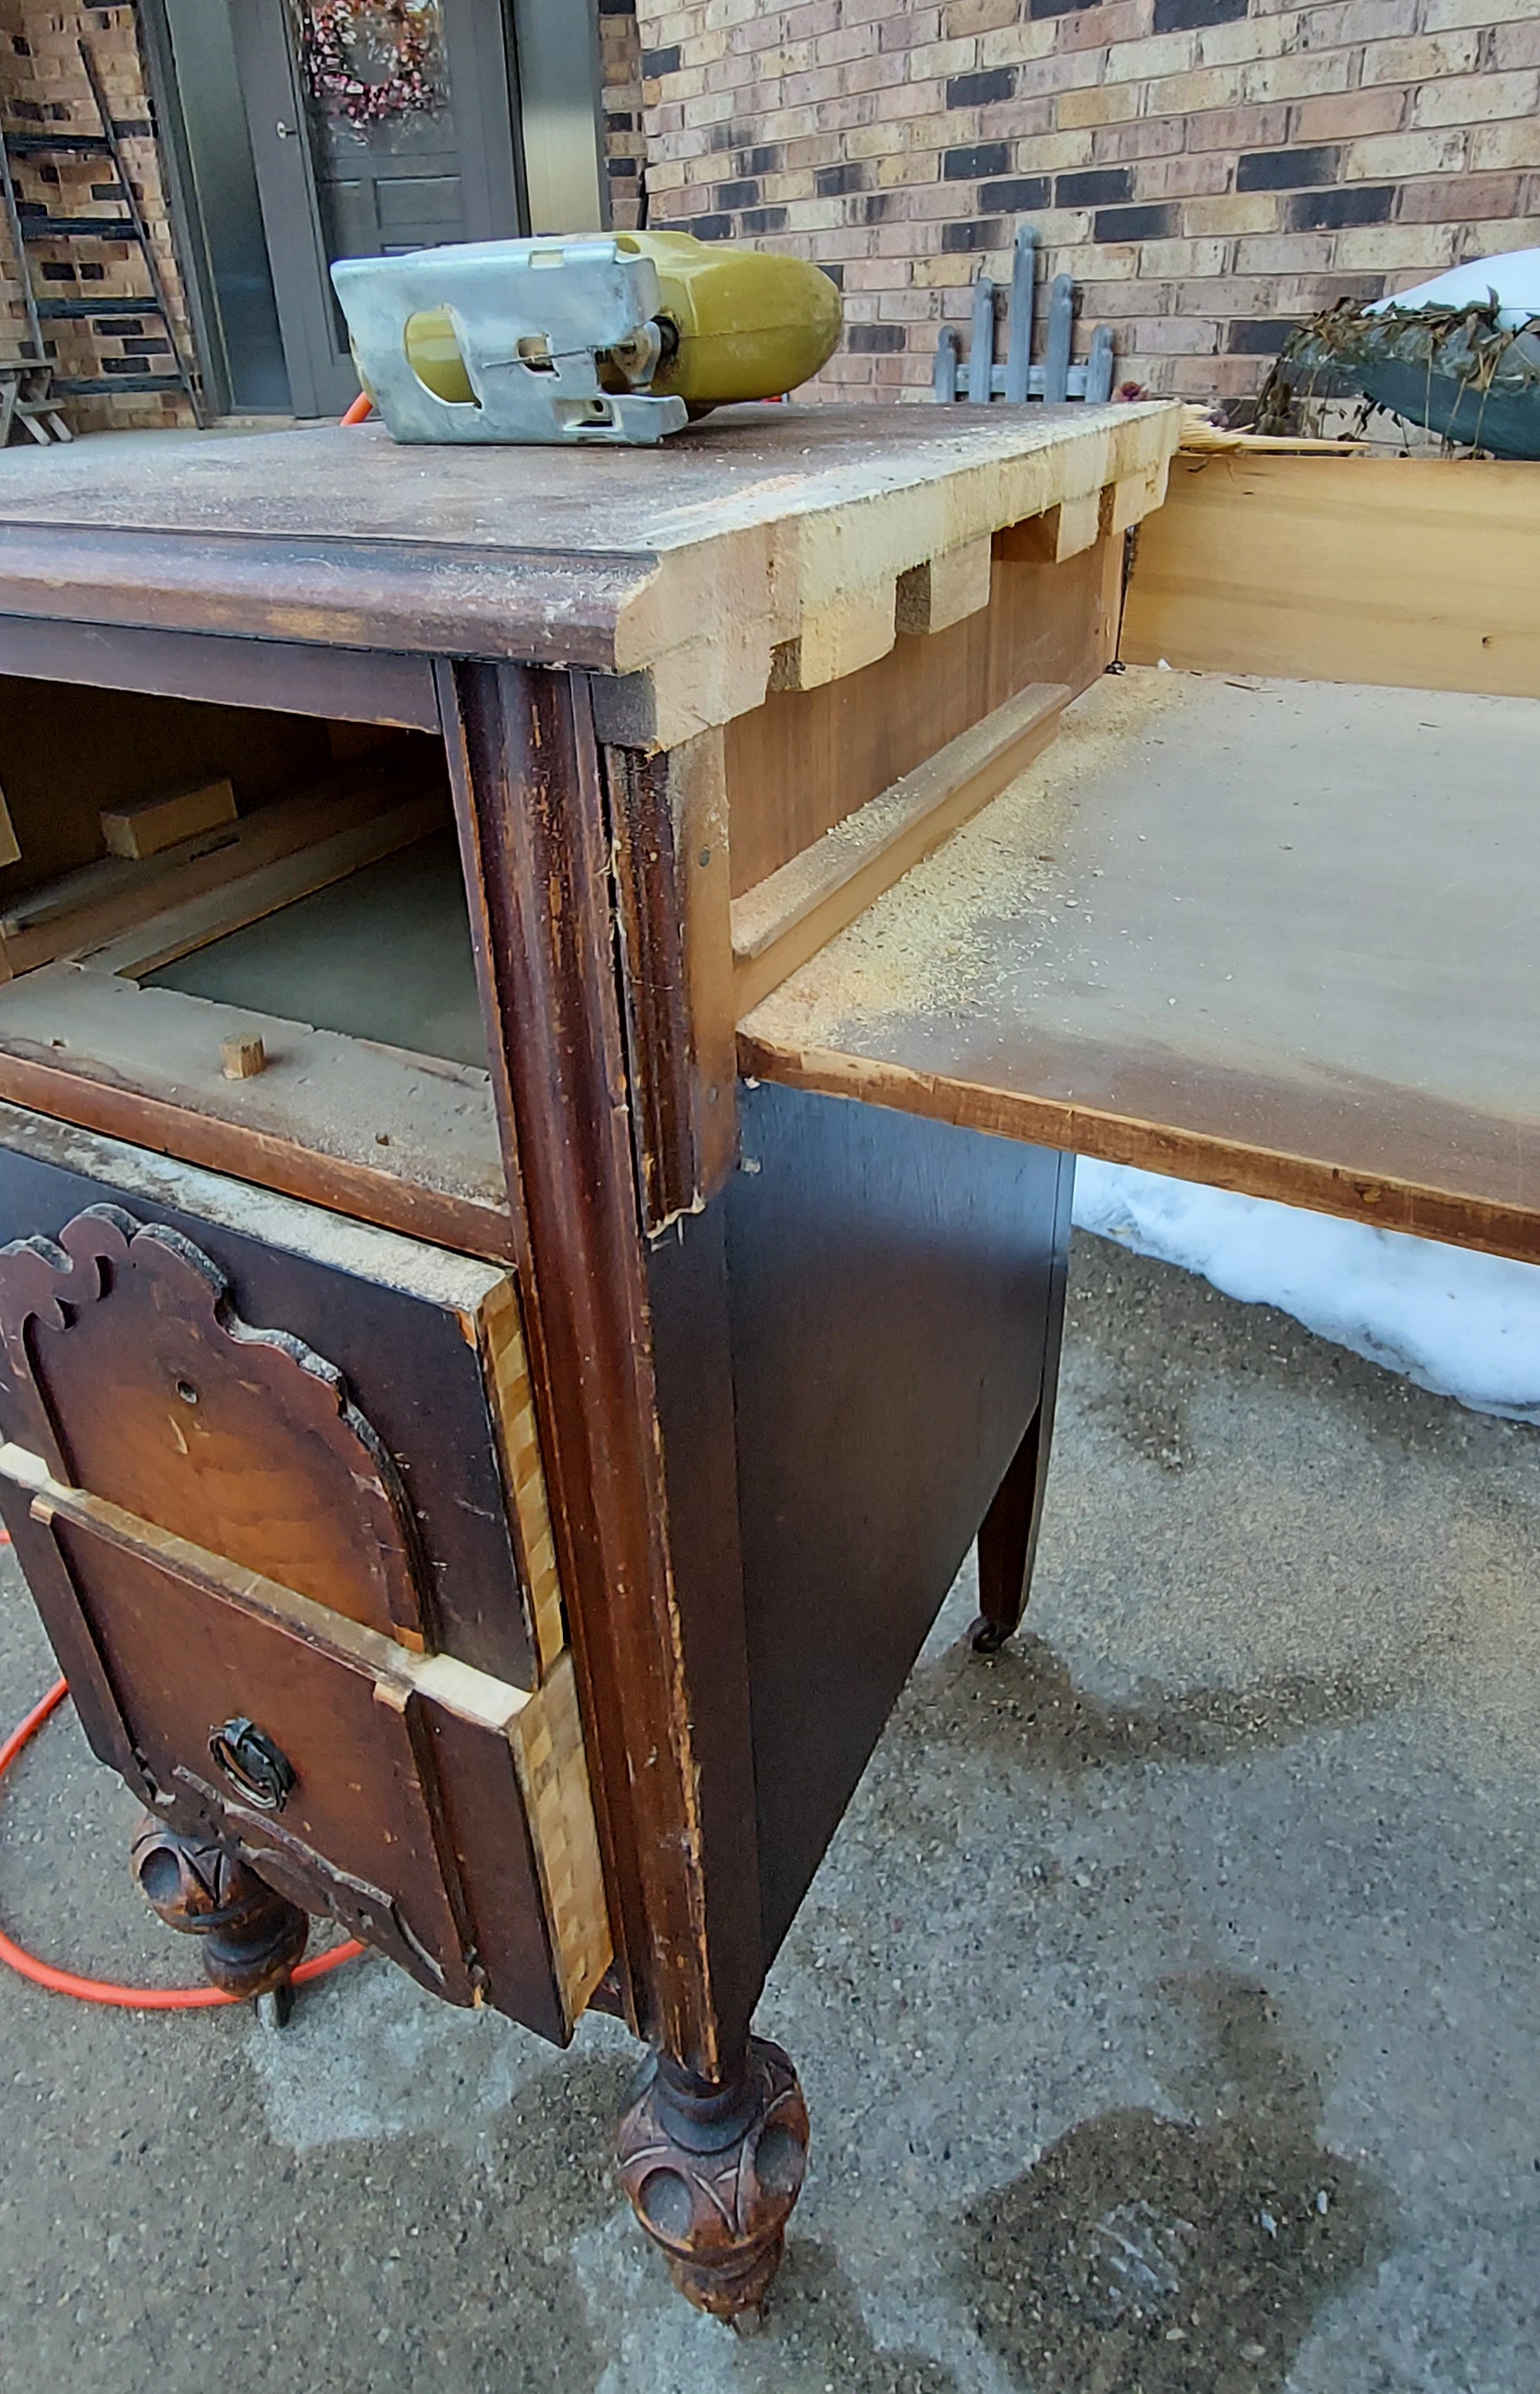
I’d like to pretend I knew what I was doing taking this desk apart, but I really didn’t. I just figured I’d start cutting and see how things go. This Black and Decker jigsaw is my most hard-working tool. It’s ages old from my own parents. I can say I’ve been through 3 orbital sanders in 8 years, but this thing still does its job well after a few decades.
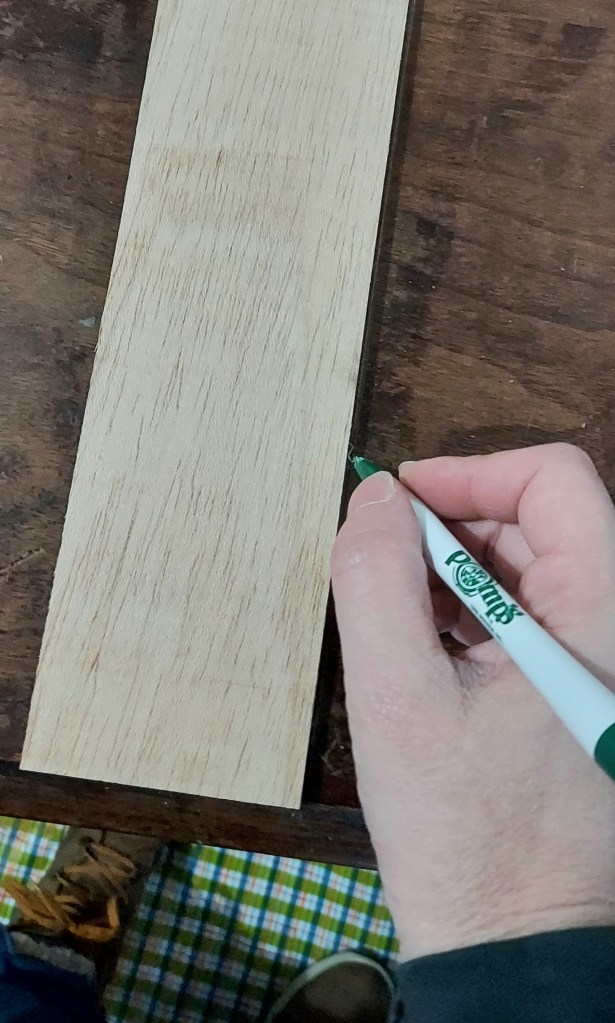
I started by marking my cut line. I knew roughly where to place it by lining up with the inside of the desk. I knew I needed to leave a lip so that I could sand a beveled edge to match the exterior edge on the top, so I accounted for a little overhang.
Then, I basically just started cutting. Sometimes you just have to go for it. I knew the context of what I needed to remove. It was just a matter of how to do it. Once I cut as close to the interior as possible, I could see I still had some pieces to remove. A good old mallet worked for most of it, especially the pieces glued on as extra support. There were, however, some wood pieces notched inside, which the mallet still got out, but it left me with holes to fill. I kind of expected that. There were also a couple wood dowels, and my hubby helped pry those out. It was work, but still doable. I have to say this was a well-made desk! It originated with Banderob & Chase Furniture Company in Oshkosh, which happened to close in 1939, so you know this has history!


The Repairs
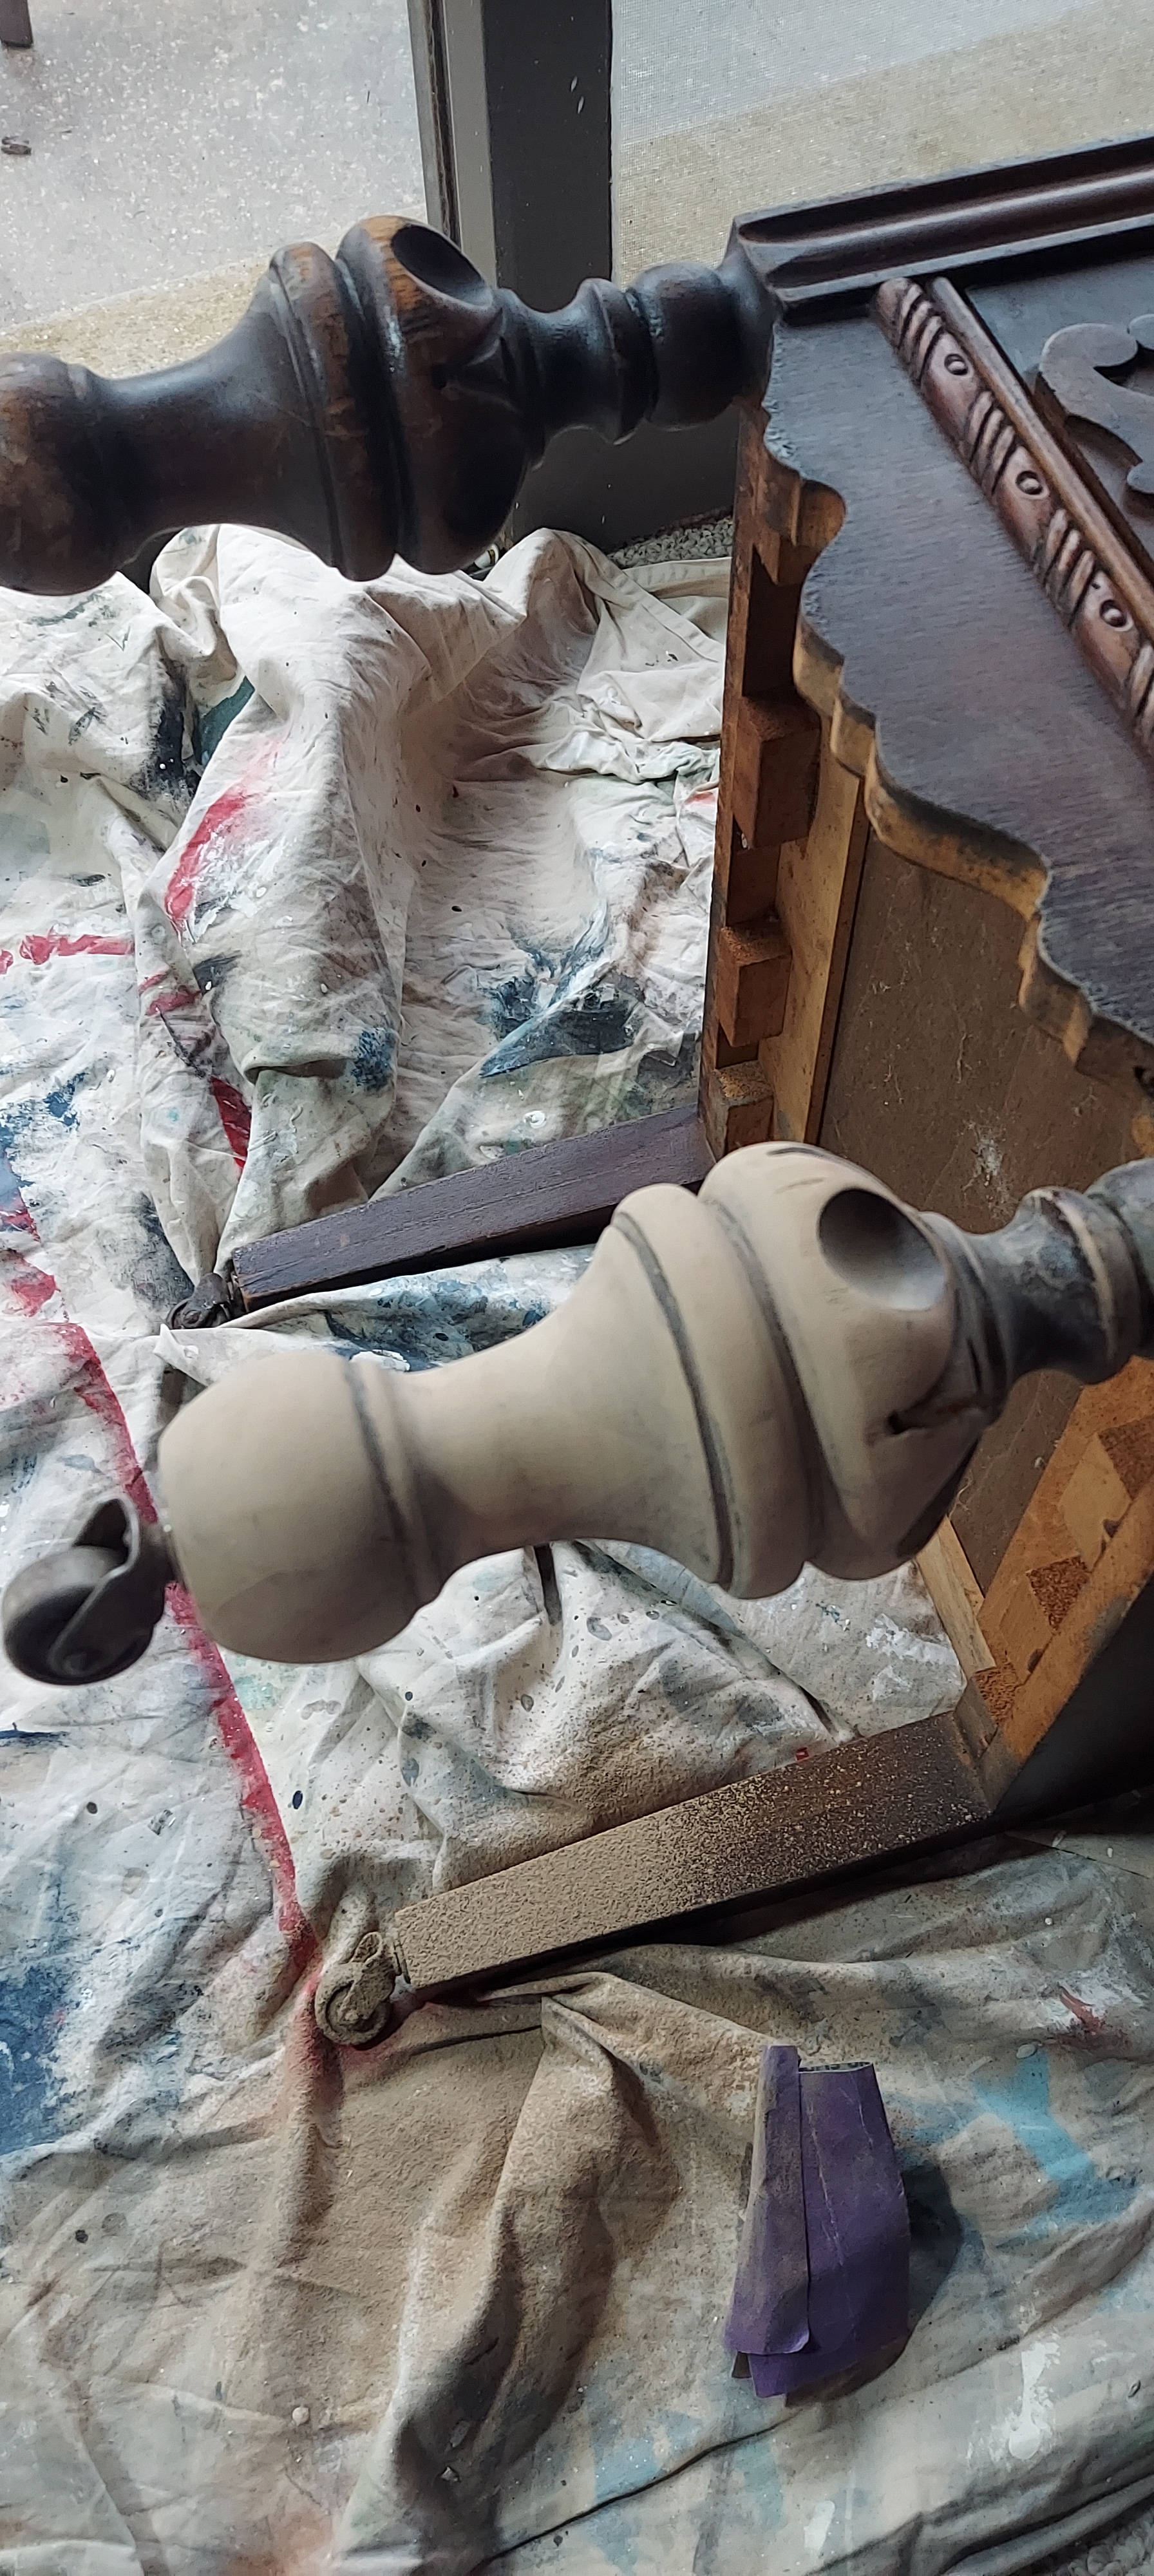
I used wood putty to fill in the holes, sanded them smooth, added some putty again for the low spots, and sanded again. This gave me a semi-flat side where I ripped apart the middle of the desk. Not perfect, but good enough for what I had a brainstorm about.
As I looked at this new embossed wallpaper I ordered, I really felt a subtle connection to the unique wood moldings on the drawer fronts. I decided these two could be married into something special. Can you see it yet?

I decided to cover the sides in this paper to hide any blemishes from the cutting. I added it to both sides to match. I painted them in the same black as the tables, a solid coverage. I have to say it was so much fun painting this embossed paper, and I cannot wait to use it again with a light brushing so that the pattern shows even more. But a solid black was what I wanted for the vision of these bedside tables. To replicate that this might be part of the crafted wood, I brushed some Antique Walnut stain in areas of the painted wallpaper. You can subtly see the brown peeking above the solid black. It helps pull everything together to have that warmth complementing the bare wood.


Rustic Appeal
Now you know I love some beautiful natural wood, and I had my heart set on exposing these chunky legs. Instead of making it perfectly clean, I rather liked the rustic finish. So I left some of the stained areas to accentuate the carvings and complement the black painted finish. Hand-sanding takes patience and time, especially when you have 4 legs to expose!

On the body itself, shortly after I painted the black on, I used a baby wipe to wipe areas back off again and let that original stained wood show through, giving it an even more rustic, farmhouse appeal.

Are you ready for the finished results? I’m quite happy with them.


If I had the space near our bed, I might have kept these for myself. Others must have really liked the look, too, because I had 3 interested buyers in less than 24 hours. Those are good results!
BTW, I realize this post is late in the day. Sorry for the delay, but I had some unexpected computer issues.
I hope you enjoyed this makeover! I always love to hear what you think, so please leave a comment. Do you have a favorite part of these? Is farmhouse one of your favorite styles, or would you have done something totally different with these? I’d love to hear your visions!
Be inspired,
Kellee
See what’s next! Subscribe to get future posts sent right to your email.


Copyright © 2022 Charm & Grit. All Rights Reserved.
