
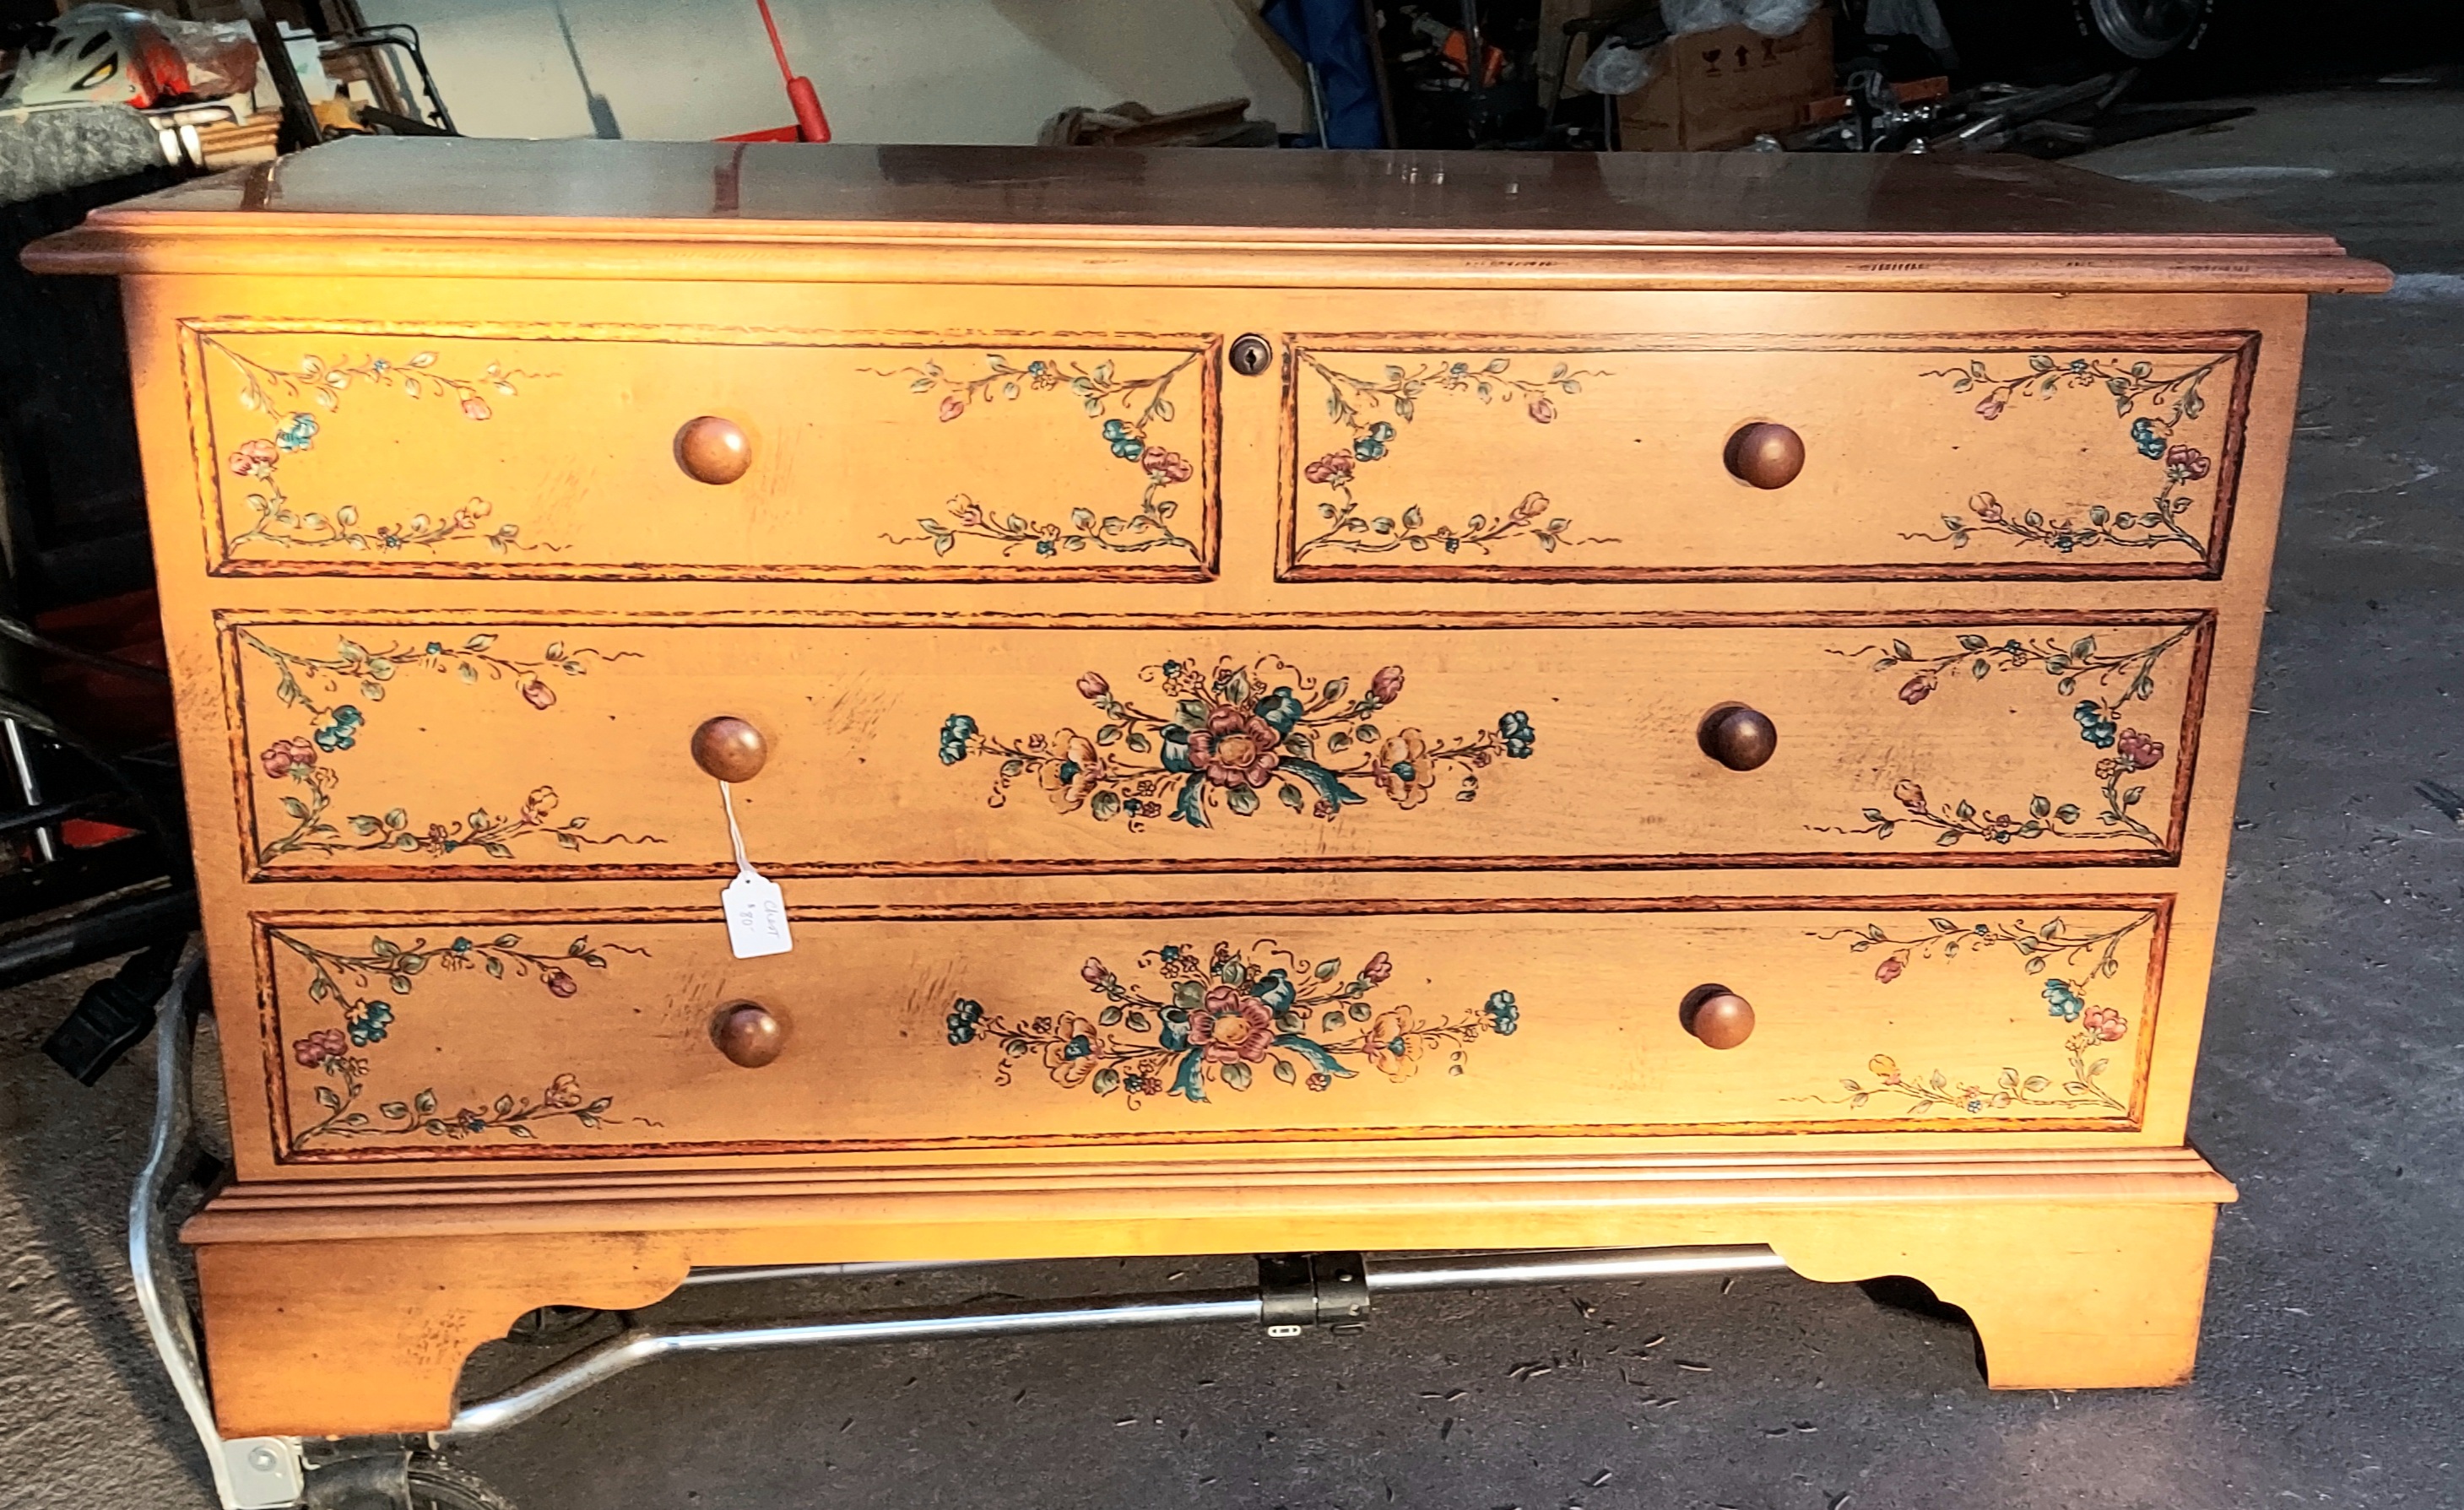
I’m excited to bring vintage furniture that feels NEW to your home with a redesign. This one’s nothing like it was before! This Lane cedar chest was in like-new condition, but the country décor led to a life in storage just waiting for someone to see the potential.
Although I had intended to buy something else from the seller, I passed on my original target because it needed too many structural repairs. The seller works estate sales, so invited me to look for a new specimen. They let me take this chest instead.
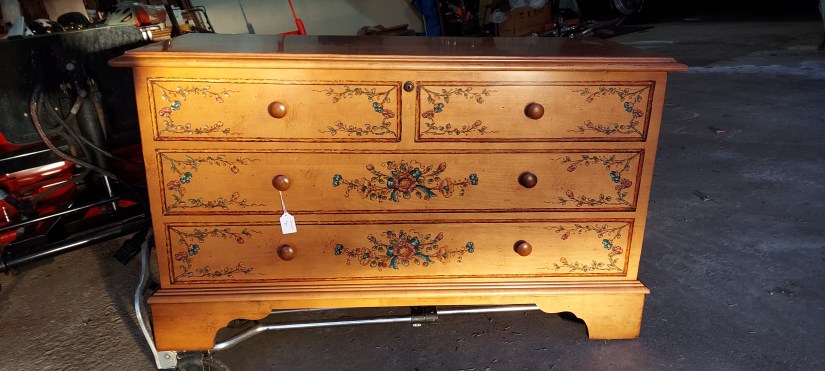
It’s been a while since I’ve redesigned a chest, but what I liked about this one was its flat surface. Despite the fact that it appears to have 3 drawers complete with knobs, they are simply painted to look that way. After removing the knobs, I had a completely flat canvas to get creative with.
Be the energy you want to attract.
– Buddha
And that’s what I did! Allowed my artistic vibes to flow. It was an especially difficult week, and I was just itching to paint something. It’s truly therapeutic for me and I needed the refuge. Here’s how it evolved.
First, I filled the holes left by the knobs with wood putty. The knobs were easily removed by unscrewing them from the interior of the chest. I’ll keep them in my stash, because you never know when you could use a set of wooden knobs.
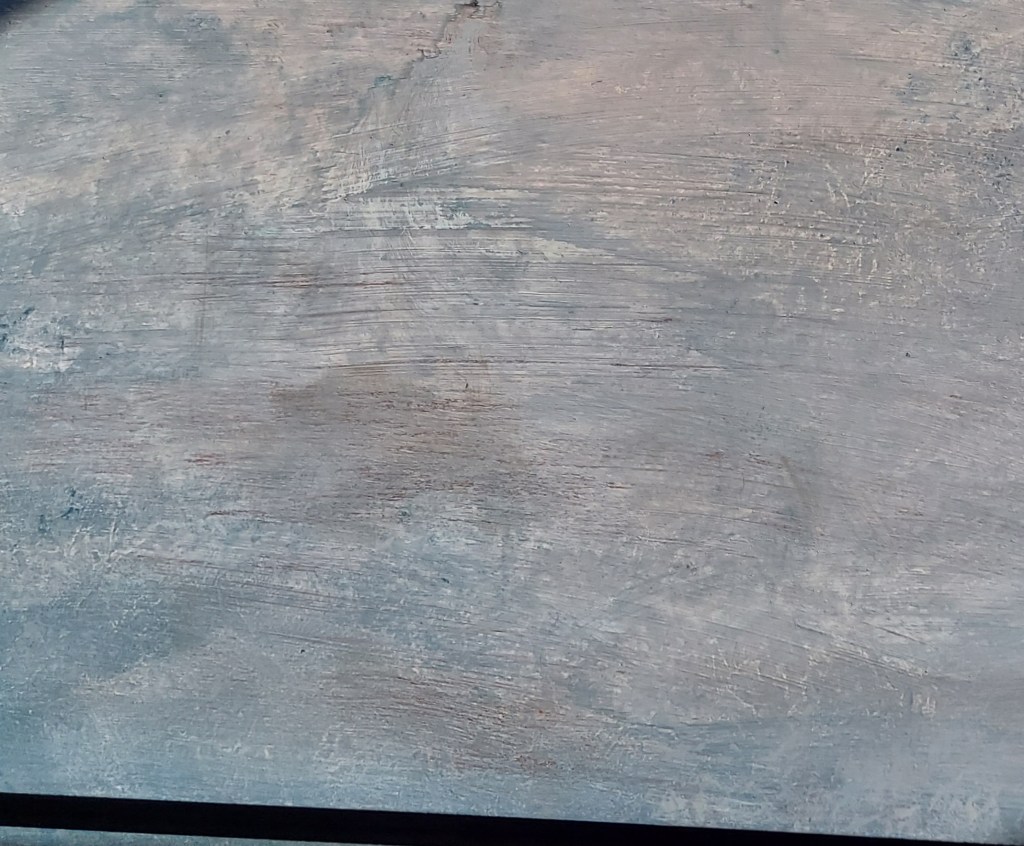
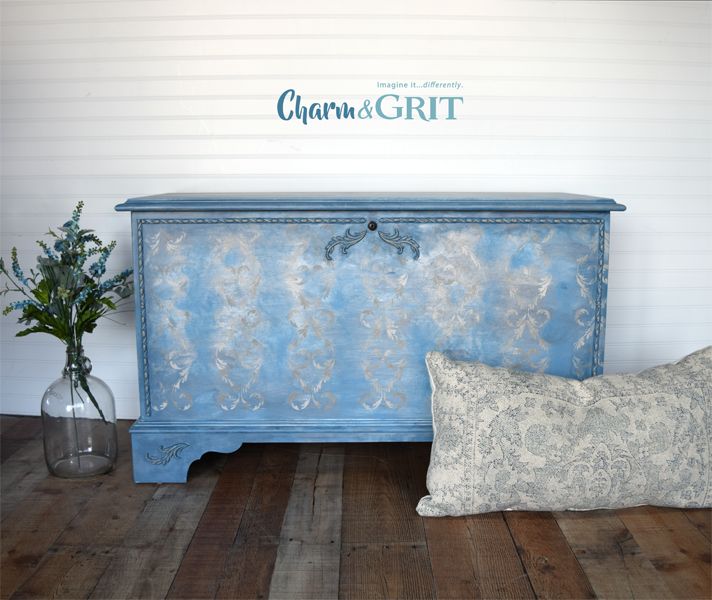
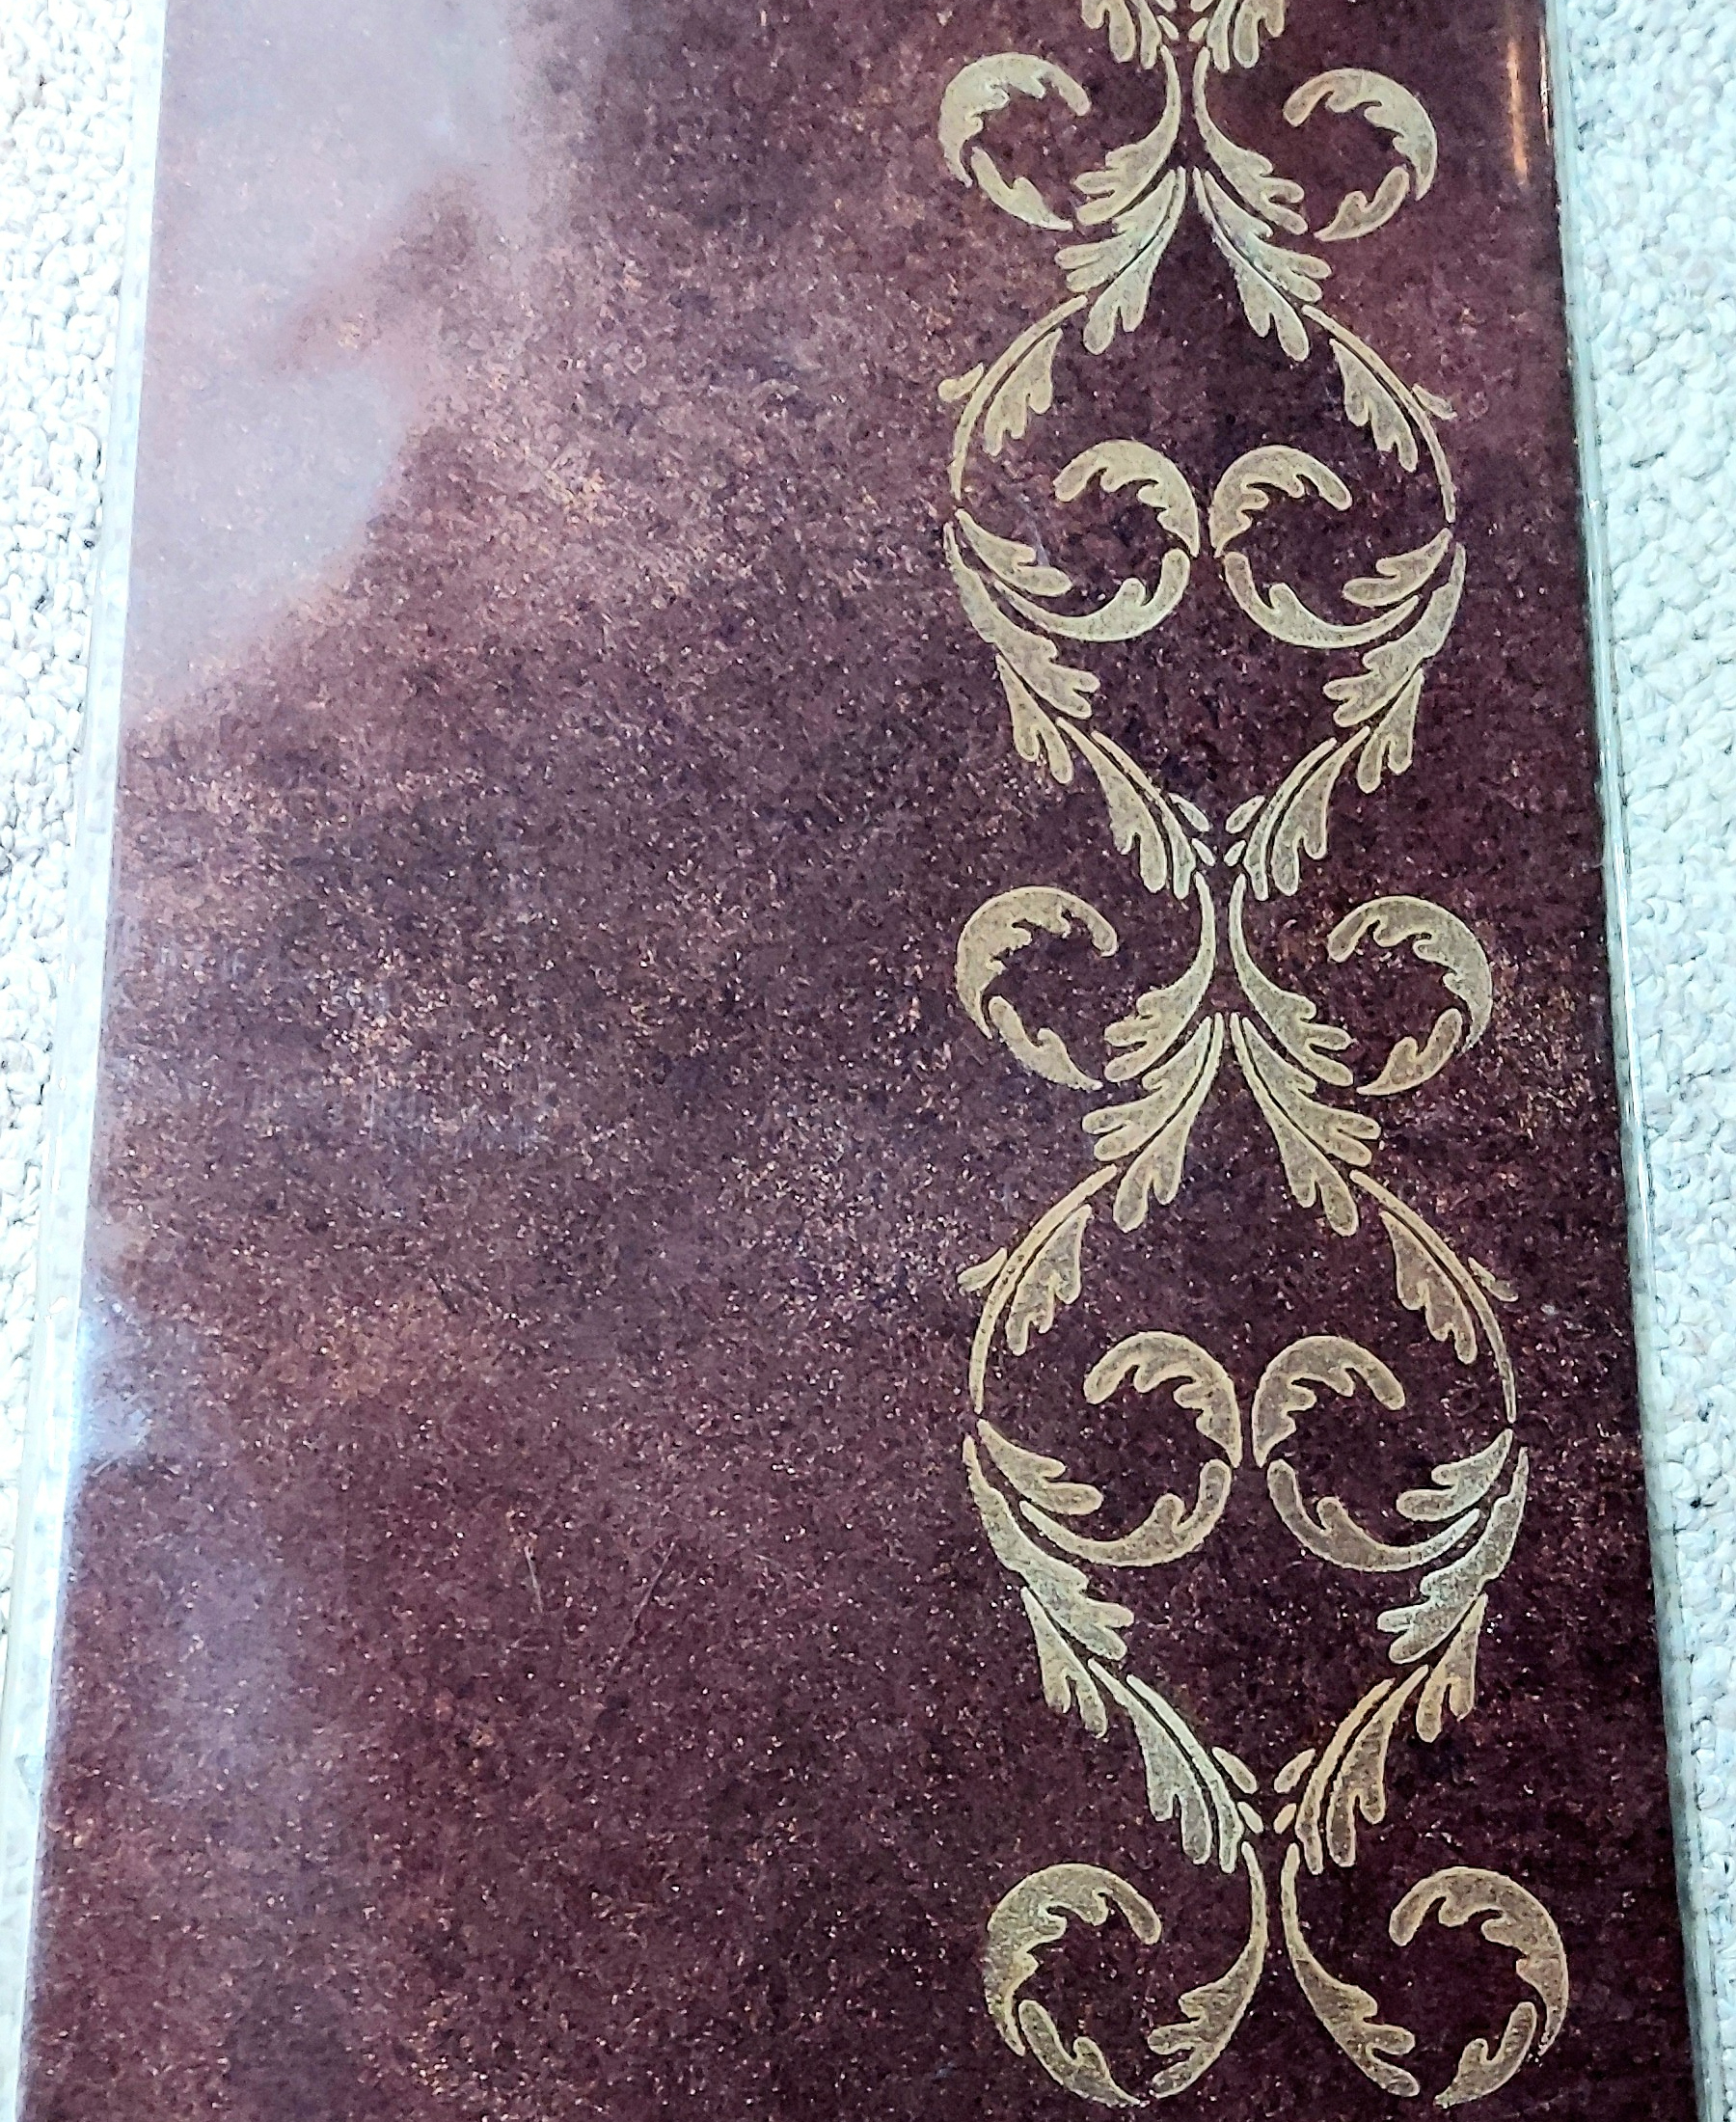
Second, I pulled a bunch of blues, grays, and tans from my leftover paints. I basically swiped the different colors together and used a water mister to water them down and allow for some blending. Overall, I didn’t want a perfect blending but a messy, aged look instead, so I didn’t have to be very precise at all.
Next, I wanted to try out one of the new stencils I purchased from the same seller. This motif is called “Caitlin” by Ralph Lauren. It’s a wall stencil, and I’m not sure if they’re still made. They tossed these into the warehouse after clearing out an old Victorian home. No reason not to grab stencils, right? I went with a repeated design with this one across the front and sides, keeping the same space between each. DESIGN TIP: to make your stencils more interesting, use more than one color. I used both Roman Plaster and Toffee Crunch for this one.

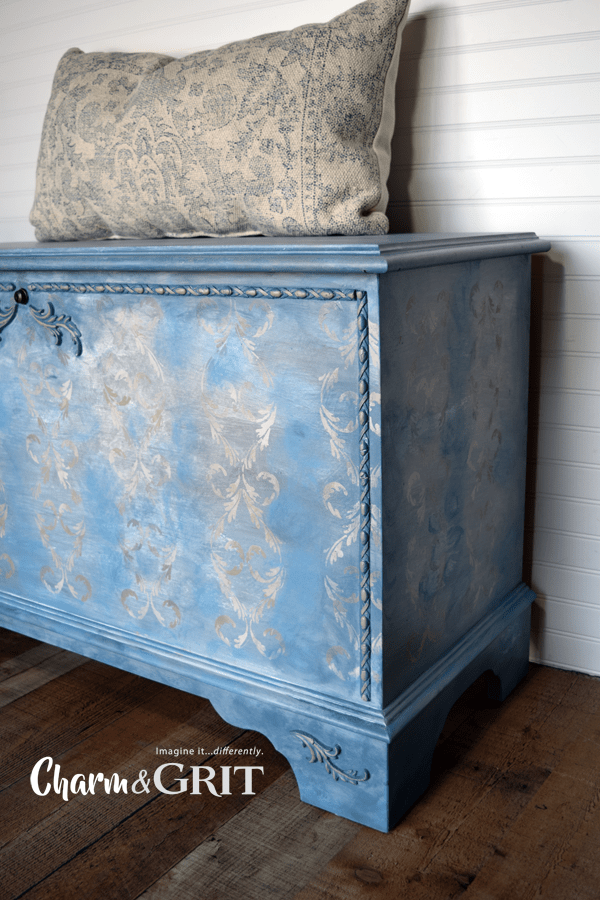
But I wasn’t quite done yet. The front needed more attention, and I did that with decorative molding by ReDesign with Prima and Iron Orchid Designs. I used a beaded frame and then Everleigh Flourish on the corners and by the latch. I carefully painted them in blue after gluing. DESIGN TIP: when buying molds, buy more than one of the same kind so that you can make 2 at once and not wait as long for the drying time to complete your task.
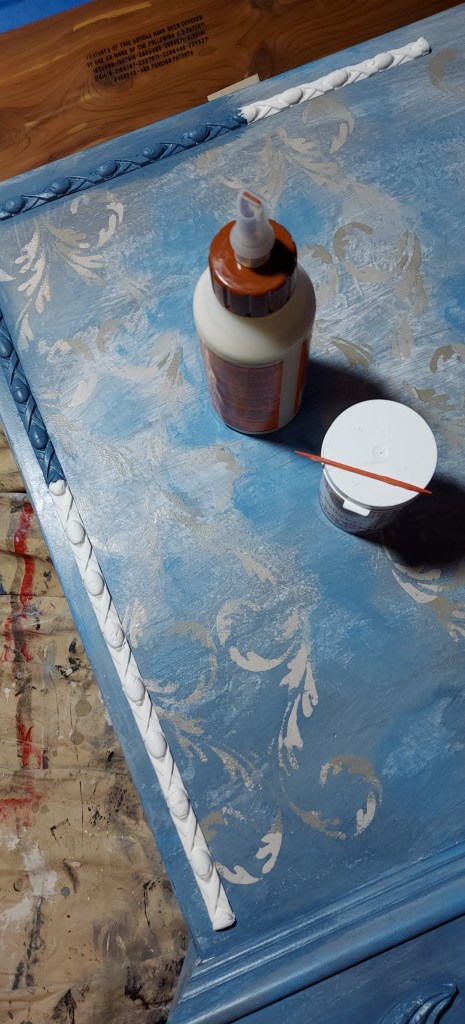
Lastly, I did some finger painting! I used the Toffee Crunch to wipe over the raised spots on the molds so they stood out against all the blue.

Of course it’s protected with a topcoat as well. I used General Finishes’ Flat Out Flat, as I didn’t want any shine to this piece.
Lots of steps, but hopefully that can help you understand how this design was accomplished. When you simply see the Before with all that old-school country and then the New with this Boho vibe, it can be tough to gauge what happened and how.
This one’s AVAILBLE, friends! I hope it will bring joy to someone’s home. Just message me for details.
Designing Joy,
Kellee
See what’s next! Subscribe to get future posts sent right to your email.
Copyright © 2022 Charm & Grit. All Rights Reserved.
