
So I’ve been planning to build a shed this spring to be a purposeful sanctuary. There are a lot of decisions needed for building a shed. One of the main ones is, How big should it be? I thought I had this part figured out, but then I took some steps that made me think differently.
All along I’ve been assuming a shed size of 14×16 feet. There’s not a particular reason for coming up with this other than it appeared to be a common size with some of the online manufacturers I researched and pricing I saw. I’ve since increased that a bit.
If you’re hoping to build a space and are struggling with this, here are some tips for coming up with the size shed you may truly want or need.
It’s not how big it is – it’s how full it feels.
(with the people you love & the stuff you love)
Get Physical
This past Fall I was studying the area of our backyard where I plan to have the shed built. It was a crisp day with lots of leaves on the ground. It reminded me of making leaf houses as a kid. And it hit me – I needed to outline the size of the shed in the actual space and see how it feels. So that’s what I did! I grabbed my measuring tape and raked up the leaves into the rectangle of my size. It helped tremendously to physically see a visual of this in the real world. And it caused me to realize 14×16 might not be enough.
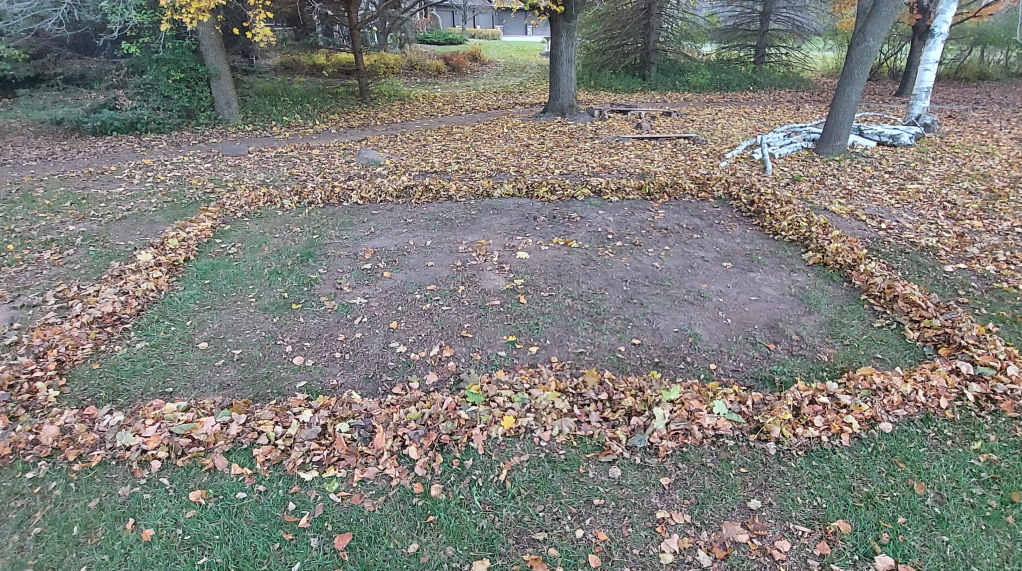
By marking where the double 3’ doors would be in the center, I could walk out how much width was to my left, my right, and depth to the back wall. I could get a better sense for how much space there really was. And honestly, it felt a little tight.
Fill the Space
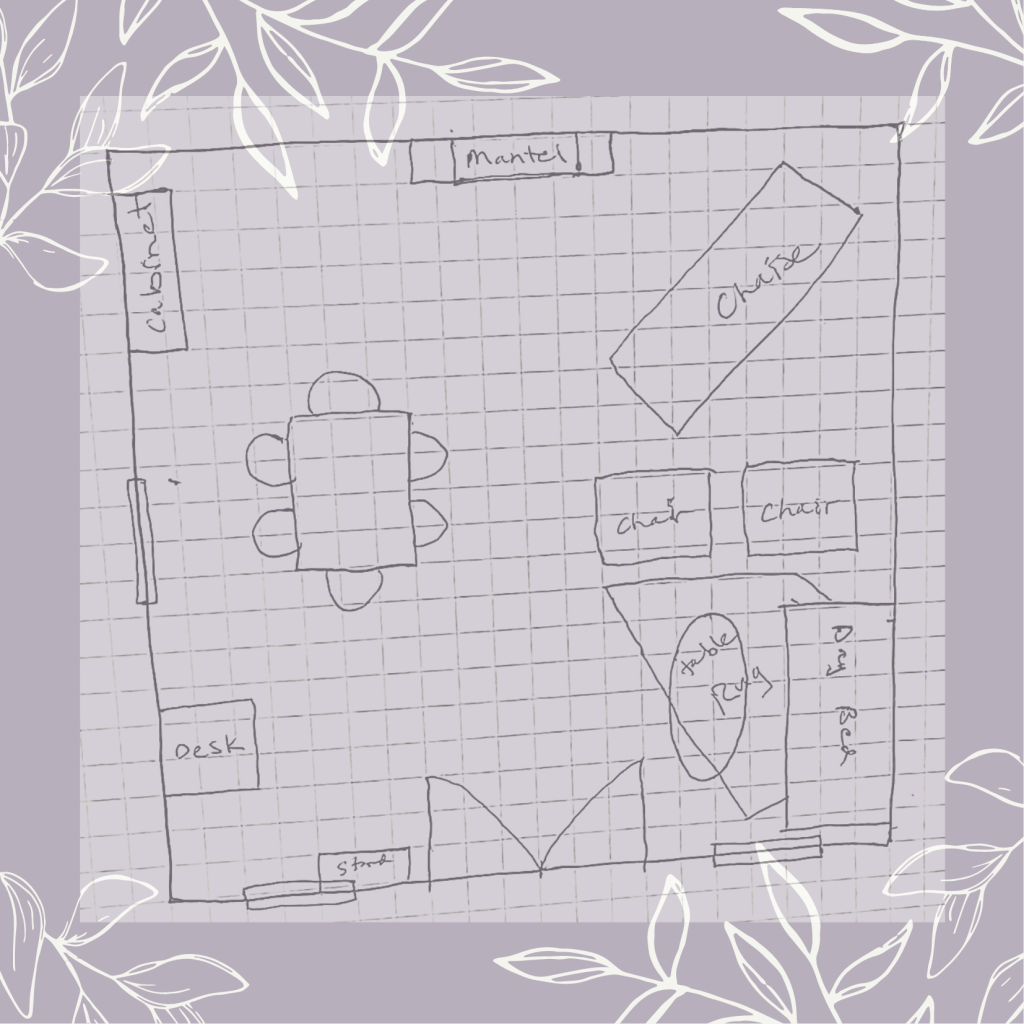
You could think to yourself that a certain size is perfectly big enough for you, but when you start to think about how you want to use the space and what you plan to put in it, you may realize the size isn’t big enough for your STUFF. I have a very strong vision of the layout of my shed. I can see exactly what’s in it (because I’ve been collecting things along the way!) and the areas I want to create. So I realized I actually need the size to fit the stuff, too!
I started with the big things I know are definitely going to be part of the design. The first was easy! An authentic fireplace mantel that came from a Wisconsin farmhouse. I cannot wait to decorate it! But honestly, this is the very first thing I want someone to see when they enter, so its spot is clearly centered on the back wall, and I want the back wall to be the tall wall (where the gable is) opposite the doors. This will be a great focal point on the tall wall.

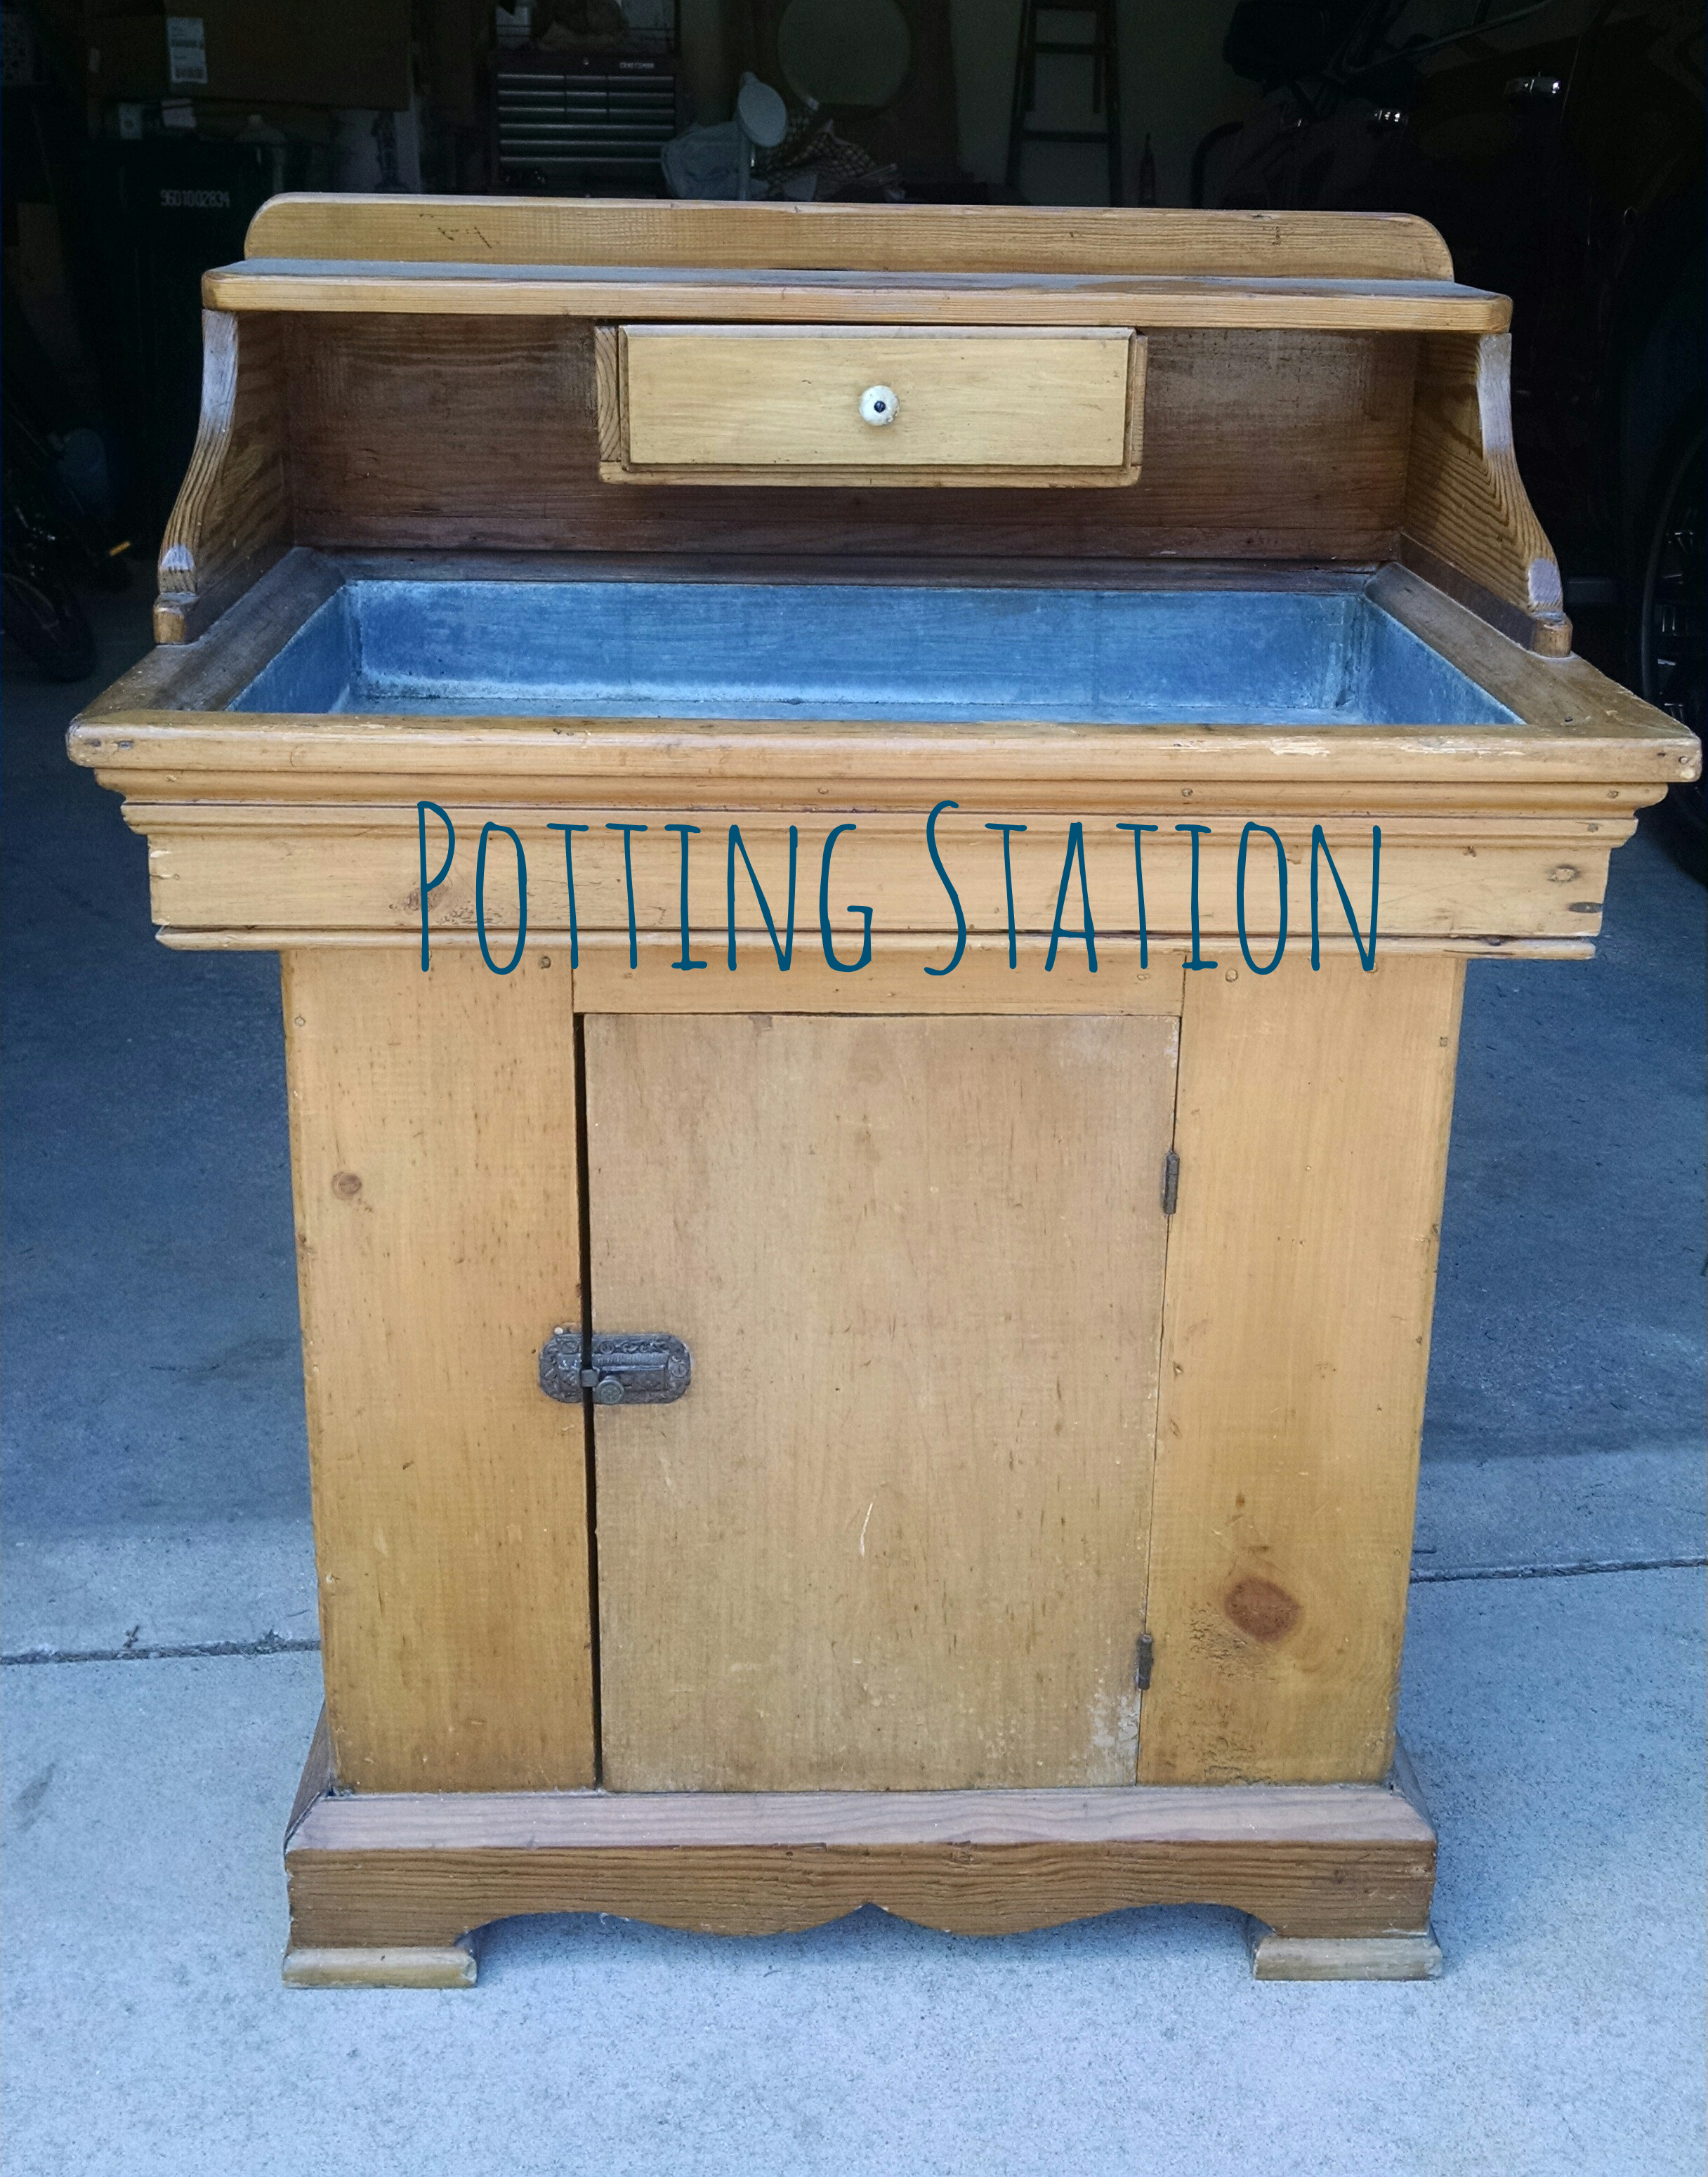
The other big items are a wrought-iron day bed to the right for an afternoon nap and a good seating area for chatting. The left side needs to accommodate my farmhouse table for Soul Gatherings and special meals for family or friends. I also wanted to fit in a few other vintage things – an antique potting cabinet that a dear client gifted me, which I thought would be nice near the door to welcome guests and arrange vases. Plus, a unique, vintage writing desk in the left corner by the windows for me to work at my computer in the summer (in anticipation of needing quiet time from the boys😊).


Daybed sourced from Kohls Department Store
By plopping the big things I want in the space and knowing the size of each, I could tell how long a wall needed to be, or how much open space I need around a 5 foot table with 6 chairs. So figure out how you’re going to fill the space, what you’re planning to put in it, and you’ll start to see if there’s room for those things you absolutely love.
Look Up and Out
It’s one thing to stare at an outline on the floor and think the footage works just fine. It’s quite another when you start to envision the three-dimensional aspect of the space. Look up to envision a solid wall next to you in this section and that section. Look up to envision the ceiling height and how it feels. Sit on a chair to see how the height feels from that area, too. For example, are you near one of the gable walls where it’s highest, or is it the normal ceiling height where you want to have the seating area? We have to remember a space is not just a floor. The walls and ceiling make a difference to a space having the right balance of coziness and spaciousness.

Something else to think about is where the windows will be. What will they be looking out upon? What will be in the space near them that might interfere with the size of the windows? What are you planning to have outside that particular window spot? For example, I want to use an old, galvanized toolbox as a sweet welcoming mailbox next to the doors, so I need to account for this when thinking of my window size and placement. And of course, be sure to know where those doors open up. I’m not actually sure if my doors should open to the interior like a normal home front door, or if my doors should open to the exterior? What are your thoughts on that?
Doing all of this helped me to land on a size of 16×18. I had toyed with 20×20, thinking more space can’t possibly be bad, but that will depend on how much the additional square footage increases my cost. Plus, I don’t want to lose the cozy feel either.
Balance What Matters Most
I hope the new size will work within my budget. The good thing is I’ve worked through all of this ahead of time, and I can clearly decide which things are negotiable and which are not if I face some needed changes.
If you’re building something like this, I hope this helped you think through the details! If there’s a specific item you’re struggling with for your future space, shoot me a message. Maybe we can figure it out together.
Joyously dreaming,
Kellee
See what’s next! Subscribe to get future posts sent right to your email.


Copyright © 2022 Charm & Grit. All Rights Reserved.
