
Wow, this is something I now wish I did long ago. After really giving some design thought to my dreary and uninviting front porch, I can’t believe what a difference small changes made!
I’m making the front porch over in stages, and today I’m sharing the first two that have been completed. After all, we’ve got to have those results photos to see what changed.
Let’s start with what desperately needed some pizazz. Now, granted, this was after winter, no spring flowers had been potted yet, and all the Christmas decor was taken down. But looking at my porch like this did not say “Welcome” to me at all. It says, Boring and Someone lives here who doesn’t care how this looks. Yuck.

I’m going to break down my changes into ideas for you to implement in your own front porch. My first was I wanted to add some variation. Having things at different heights helps draw the eye around the space and not end up landing on nothing. When the eye lands on everything at once because it’s all the same or nothing at all because it’s all the same, then the design becomes aesthetically un-pleasing. The opposite of what I wanted.
Go Vertical
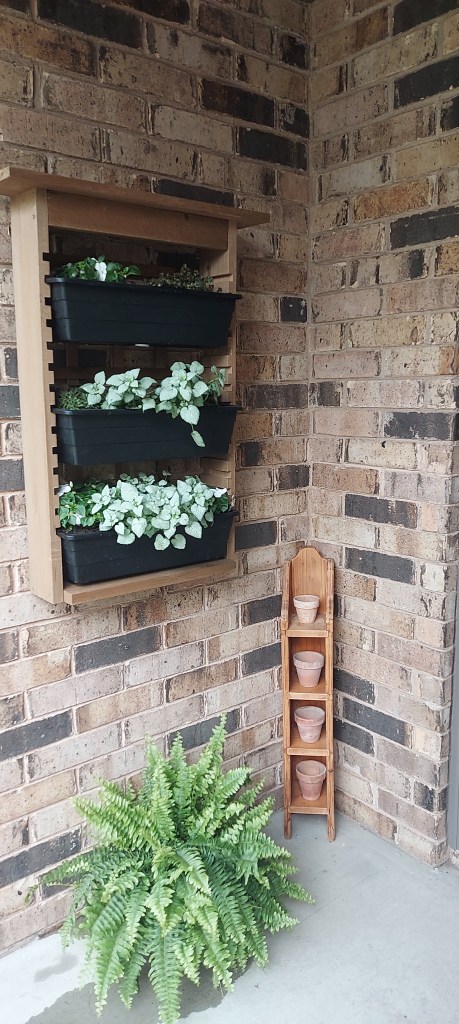
The ladder was supposed to add a bit of height to the space, but it just looks lonely here. I needed something else. I had the idea to add a planter to the side wall and found one on Amazon I liked. The natural cedar frame and black potting trays would fit well into the rest of my design plans. Putting it together was super easy, too. The total cost was about $80, but when you see how much it adds to the overall look, I feel like it was definitely worth the investment.


My dilemma that I refused to let stop me? How to attach it to a brick wall. I went to my local hardware store, got the right screws and drill bit to go into concrete, used my handy electric drill and a lot of pressure, and made the holes for the screws to hang my planter on. It worked! Moral of the story: when you want to do something, do it right, but don’t second guess yourself. You can make it happen!
Add Greenery
Nothing livens up a space like fresh, green plants. Flowers, too. Each Mother’s Day, I do my planting of annuals in the front of the house. So I took this opportunity to do the other porch design changes, too. The Boston fern was a nice add that one of my Facebook followers suggested.
Do you see the other vertical element in the corner? I bought this small shelf at a garage sale years ago and never had a place for it. Now it shows off some of my miniature terra cotta pots.

Double the Rugs
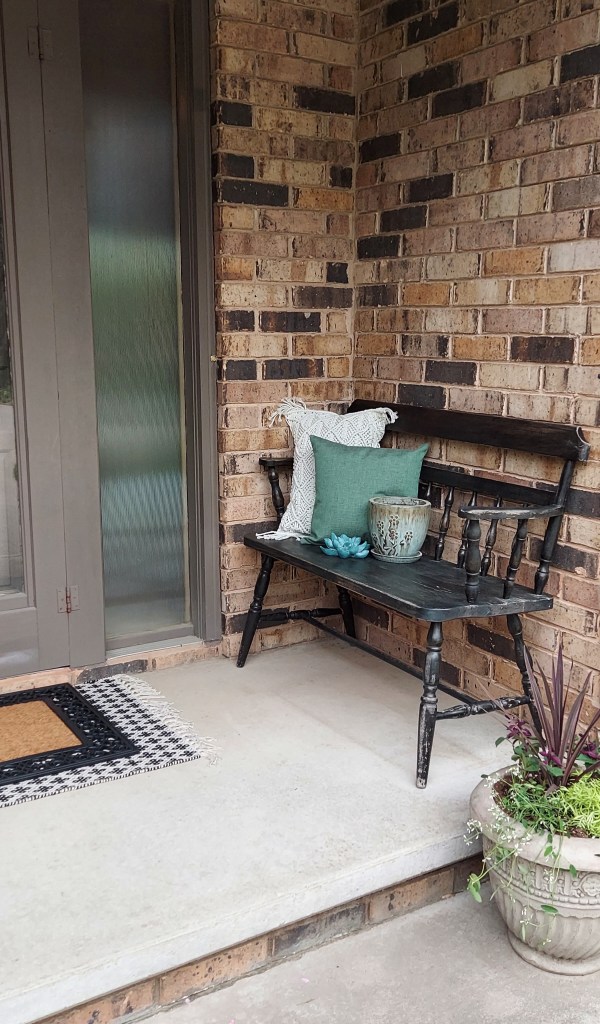
I have seen lots of designs lately with double rugs, both inside and outside. My existing semi-circle doormat felt too small for the space since my door is wider with the two side lights. To make a stronger impact, I added a black and white patterned rug below a longer, heavier doormat that pulled in warm brown to complement the brick with the natural coir pile. The doormat is super weather resistant and will not blow away. I like how the outer rubber design shows more of the patterned rug below.

Add Decor
In addition to the rugs, I added some other soft textured elements with pillows on the black bench I already had. Pillows or blankets always add a warm, inviting feel to a space…even an outdoor one. The decorative teal ceramic lotus flower was a way for me to bring my color of choice into the space, too. I knew I wanted to add some color, but I didn’t intend for the whole entry to be a big color wheel, so the black and white and natural greens is the focus of my design.
Here are the results! What do you think of Phase 1?

The lighting was a little yellow this time of day, but these small things really added up. Obviously, adding life to my two planters helped a ton, too. But now when you are up on the front porch, there are pleasing things to see. It feels so much better. My husband even commented that it felt more current/modern and not as dated. Yay for Phase 1!
On to Phase 2!
Paint the Door
Our house is VERY BROWN. This is something I’ve never loved, but with it being a brick home that doesn’t require any upkeep, what are you going to do? Painting the whole thing might be a future endeavor, but for now, I knew I wanted to rid that front door of its ugly brown paint.
With painting, what’s always the first step? Well, besides choosing a color and getting your supplies ready. Yep, the dreaded taping! Not my favorite part of the process, but it makes a difference.

AND…after I was done, it made the mistakes of the first painter a lot more obvious. I had quite a bit of scraping to do to remove the old putty and old brown paint that lingered on BOTH sides of the glass.
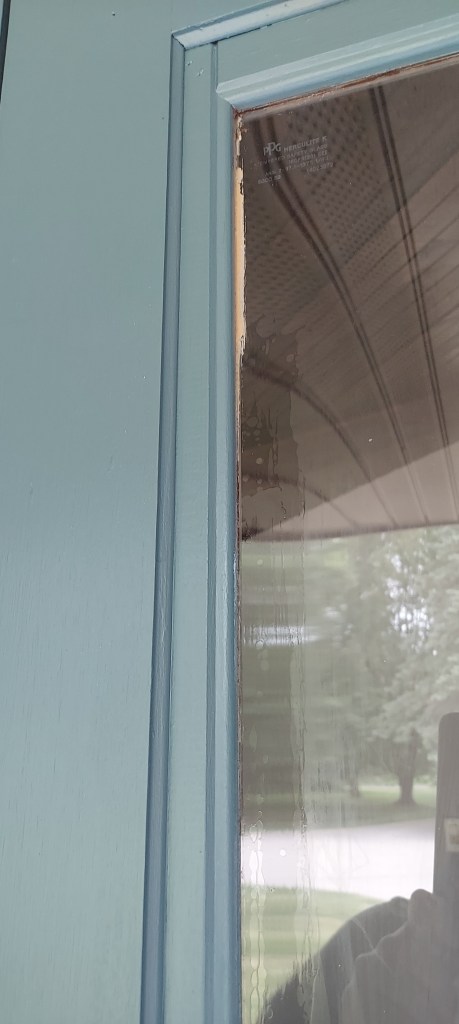
My new color? It’s a rich blue-green called Brooklyn in an exterior paint by Behr. It took me a little bit to get used to it because that drab brown has been there for literally 20 years! But I’m loving the energy it has. Bonus: my husband loved it right away.
And here are the results of Phase 2!
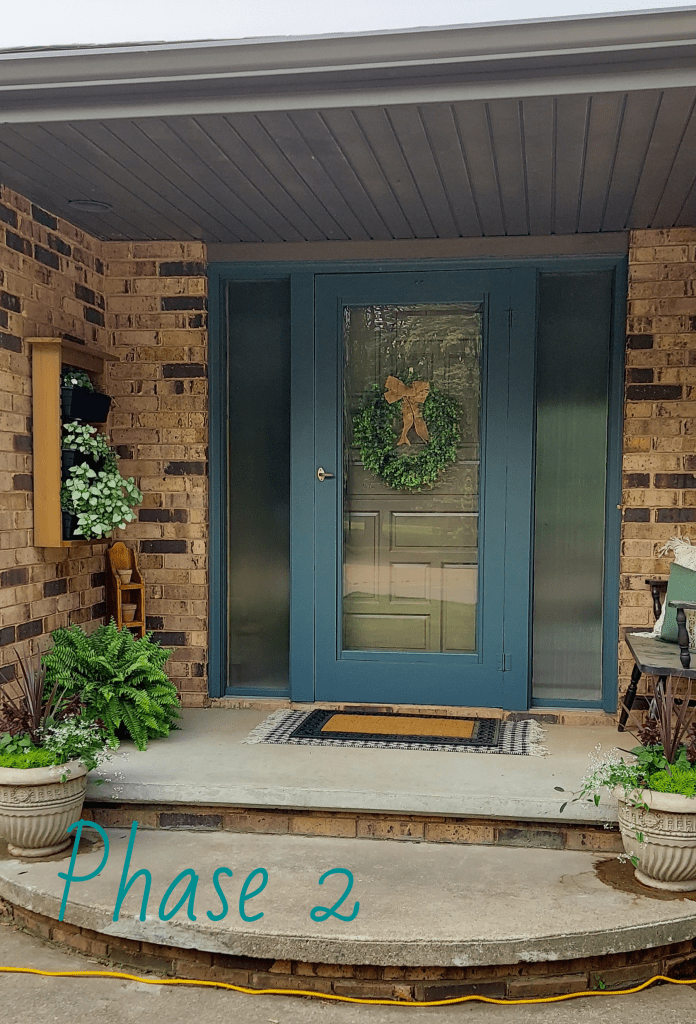
The plants have really taken off, and it feels more like OUR home now. The whole thing probably cost me a little over $200, but most of that was related to the plants themselves, which I know is an investment I expect every year anyway for my annuals.
I hope you liked this porch makeover and it gave you some ideas to spruce up your own space. When you love what’s around you, it really does make a difference with your everyday attitude and outlook.
Be inspired!
Kellee
See what’s next! Subscribe to my Blog to get future posts sent right to your email.

Copyright © 2022 Charm & Grit. All Rights Reserved.
